From package to first request.
Start with the right allocation, understand each setup step, and make one small request before expanding your workflow. This quick start covers registration through your first connection.
A request requires an active allocation with working connection details. If you are exploring the product, you can still read the guides and compare package terms.
1. Check what you are setting up
Sign in to your account and open the relevant package or existing order. Review the product type, quantity, unit, access conditions and activation status. A bandwidth package and a time-based allocation have different limits; use the terms attached to your order.
Create an account at Sign up and verify your email, or sign in to an existing account. Contact support if you need help activating a package.
2. Complete the checkout, if required
Select an available package and complete its live Stripe checkout. Review the package total and access terms before paying. A return to the workspace does not by itself mean the payment was confirmed or the allocation is ready.
Keep the original order reference. If the screen appears delayed, reopen that order and check its progress before starting another checkout.
3. Wait for the allocation to be ready
Payment confirmation and connection setup are separate stages. Wait for the order to show a ready allocation before trying its connection details.
| What you see | What it means for you | Next action |
|---|---|---|
| Payment awaiting confirmation | Checkout completion has not yet produced a confirmed order state | Keep the same order and check again |
| Setup in progress | Allocation provisioning is not complete | Wait; contact support if the delay needs review |
| Active allocation | The order has connection details for a proxy gateway | Continue with the connection builder |
| Suspended, refunded or disputed allocation | Access may be restricted or being suspended | Review the order and contact support |
These explanations describe the setup workflow; check your order for its current status.
4. Build the connection
Open the active allocation's connection builder. Select a supported protocol and the available targeting and session settings for that product. Reveal the credentials only when needed and keep them out of shared notes, screenshots and logs.
Use the gateway hostname and protocol-specific port supplied for that allocation. Do not replace them with the MiProxy website address. MiProxy uses branded gateways such as proxy.miproxy.io and unlim.miproxy.io; use the hostname and port shown for your product.
Your client sends requests through the proxy gateway. Manage the package, connection settings and usage from your MiProxy workspace.
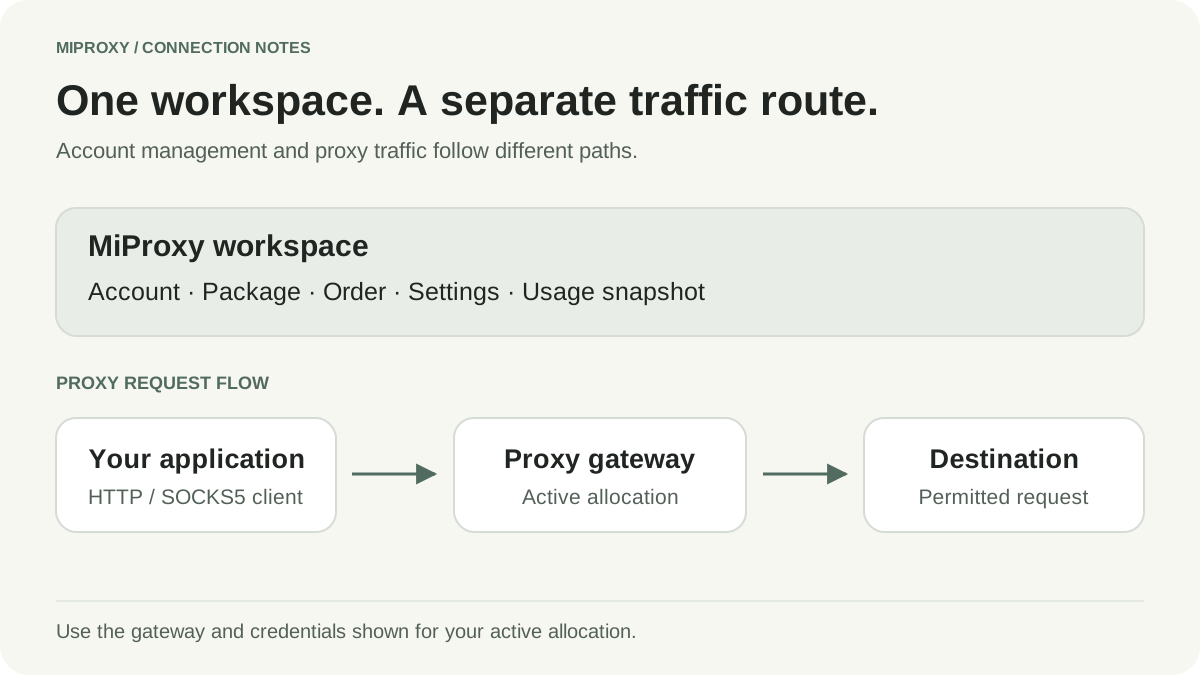
5. Make one small, permitted request
Choose the guide for your client: cURL or Python Requests. Their templates use placeholders, so they are not working credentials or proof of a live connection.
Use a destination you are authorized to query and a response you can check. Set bounded timeouts. Confirm authentication and protocol before adding location or session requirements. Inspect the response itself; a status code alone does not establish that the information you needed was returned.
6. Check the result and usage timestamp
Record the check time, selected settings and sanitized result. If geography matters, compare the observed location with the task's acceptance rule. Validate the location and session behavior required by your workflow.
The usage screen shows the latest usage snapshot and its sync time. It may lag behind the request you just made. One GB means 1,000,000,000 bytes.
If the first request fails
HTTP 407: start with proxy authentication troubleshooting. Check the active allocation, credentials and authentication method before retrying.
Connection or timeout error: check the gateway, protocol-specific port and client settings. Keep the retry count bounded and capture a sanitized error category.
Unexpected content or location: verify the permitted destination and expected response, then compare the same request with only one setting changed.
Order or setup problem: open workspace support with the order reference, time with timezone and a short description. Remove passwords, cookies and authorization headers.
Keep the next step small
Once the first request is understood, decide whether your workflow needs rotating or sticky sessions, and estimate bandwidth and access terms before scaling the task.